Cloud Native Suite
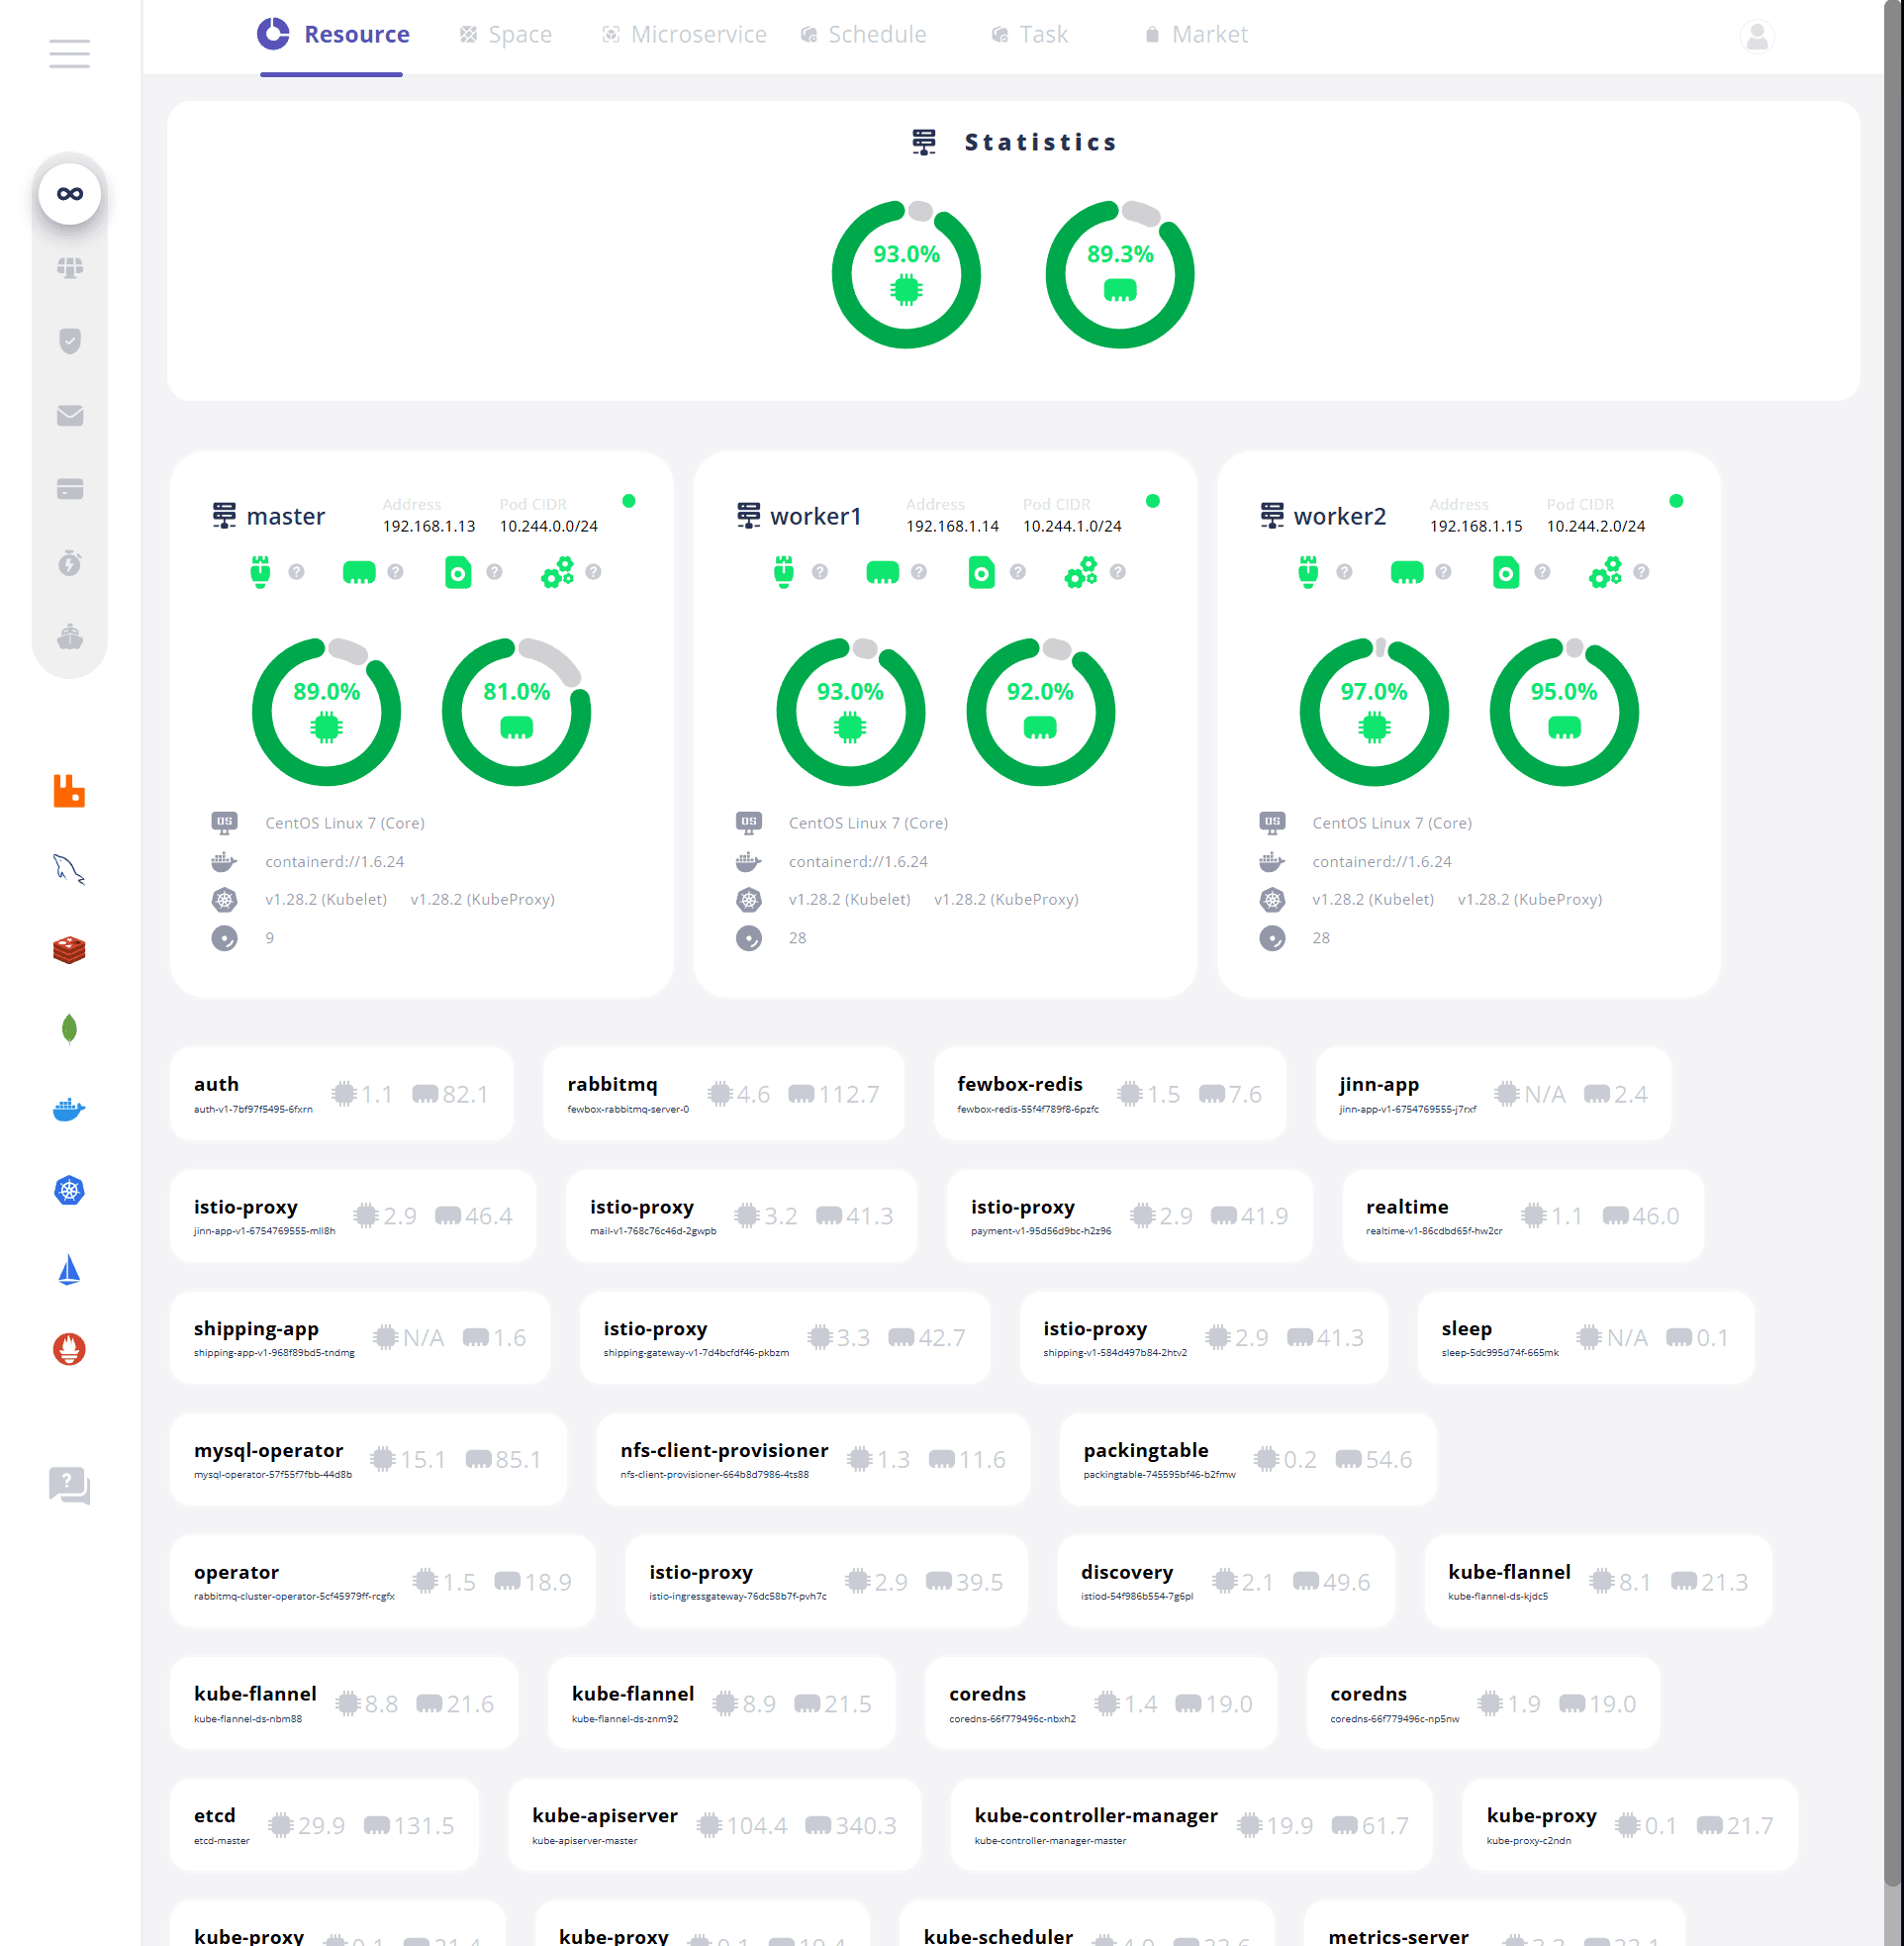
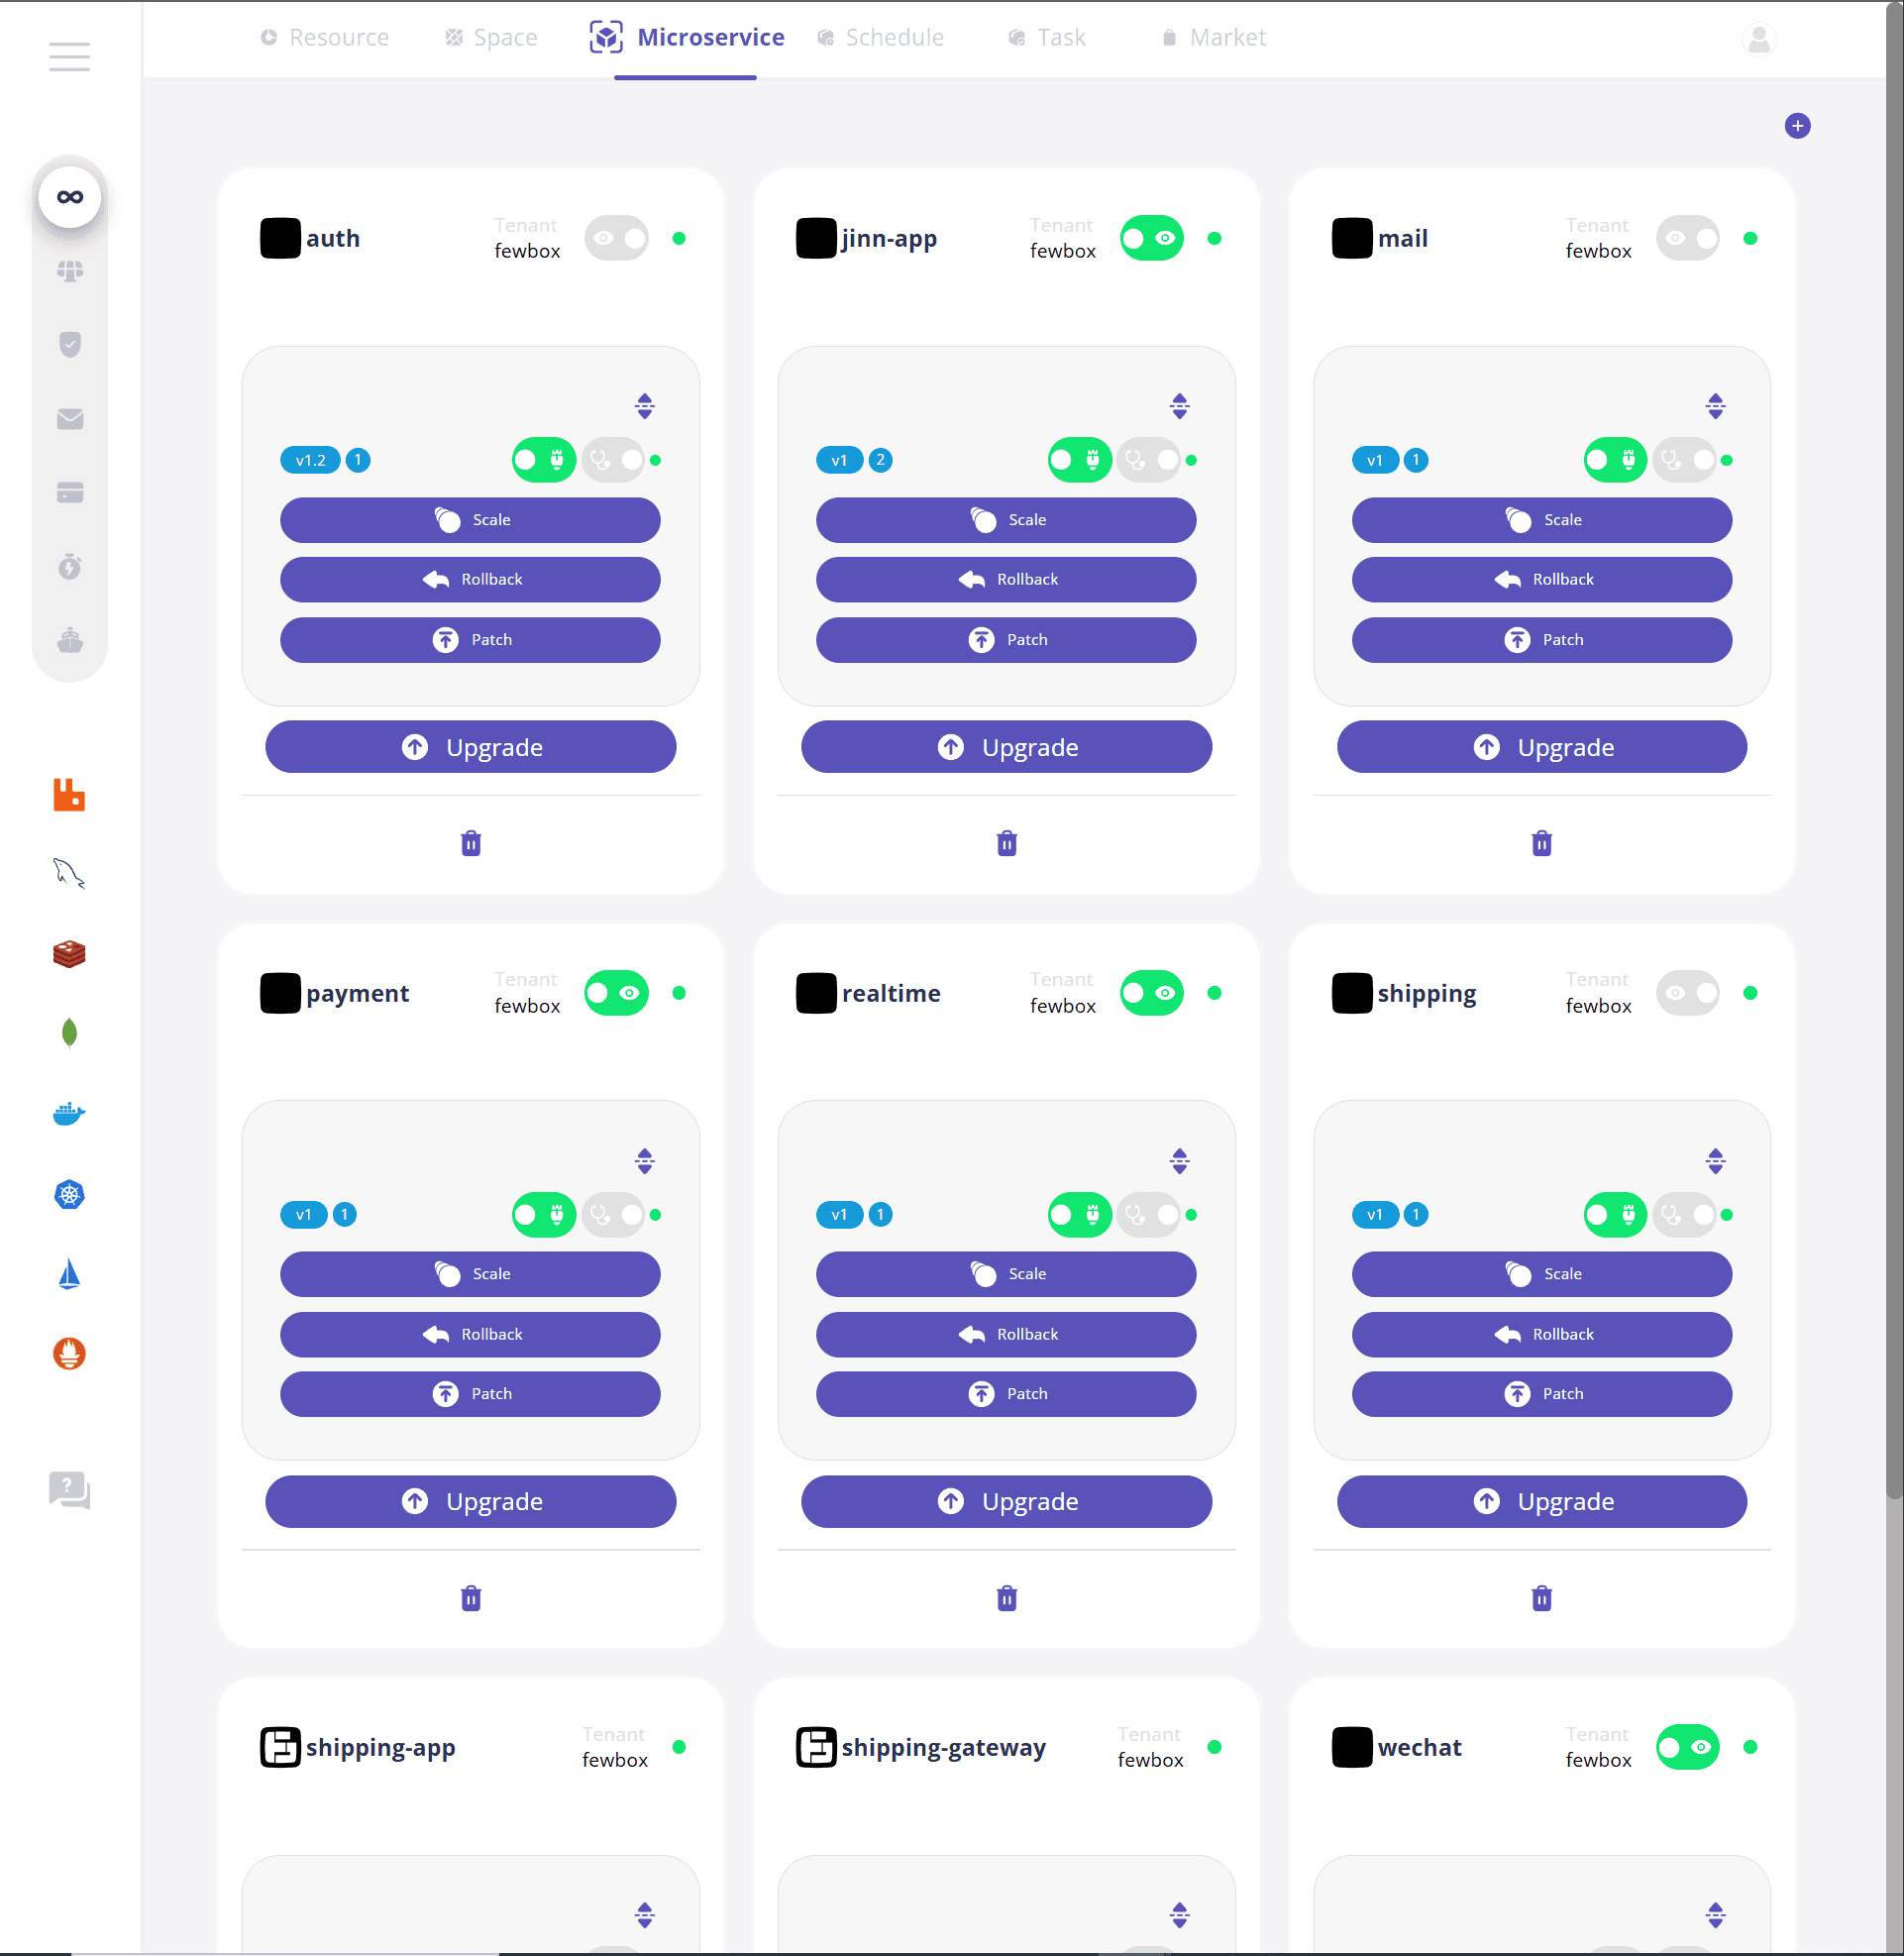
This quick guide will show you how to use FewBox to manage your infrastructure and microservices on a cloud-native platform.
Getting Started Guide
You will find some useful tips to help you prepare for improving work efficiency.

Minimal Deployment
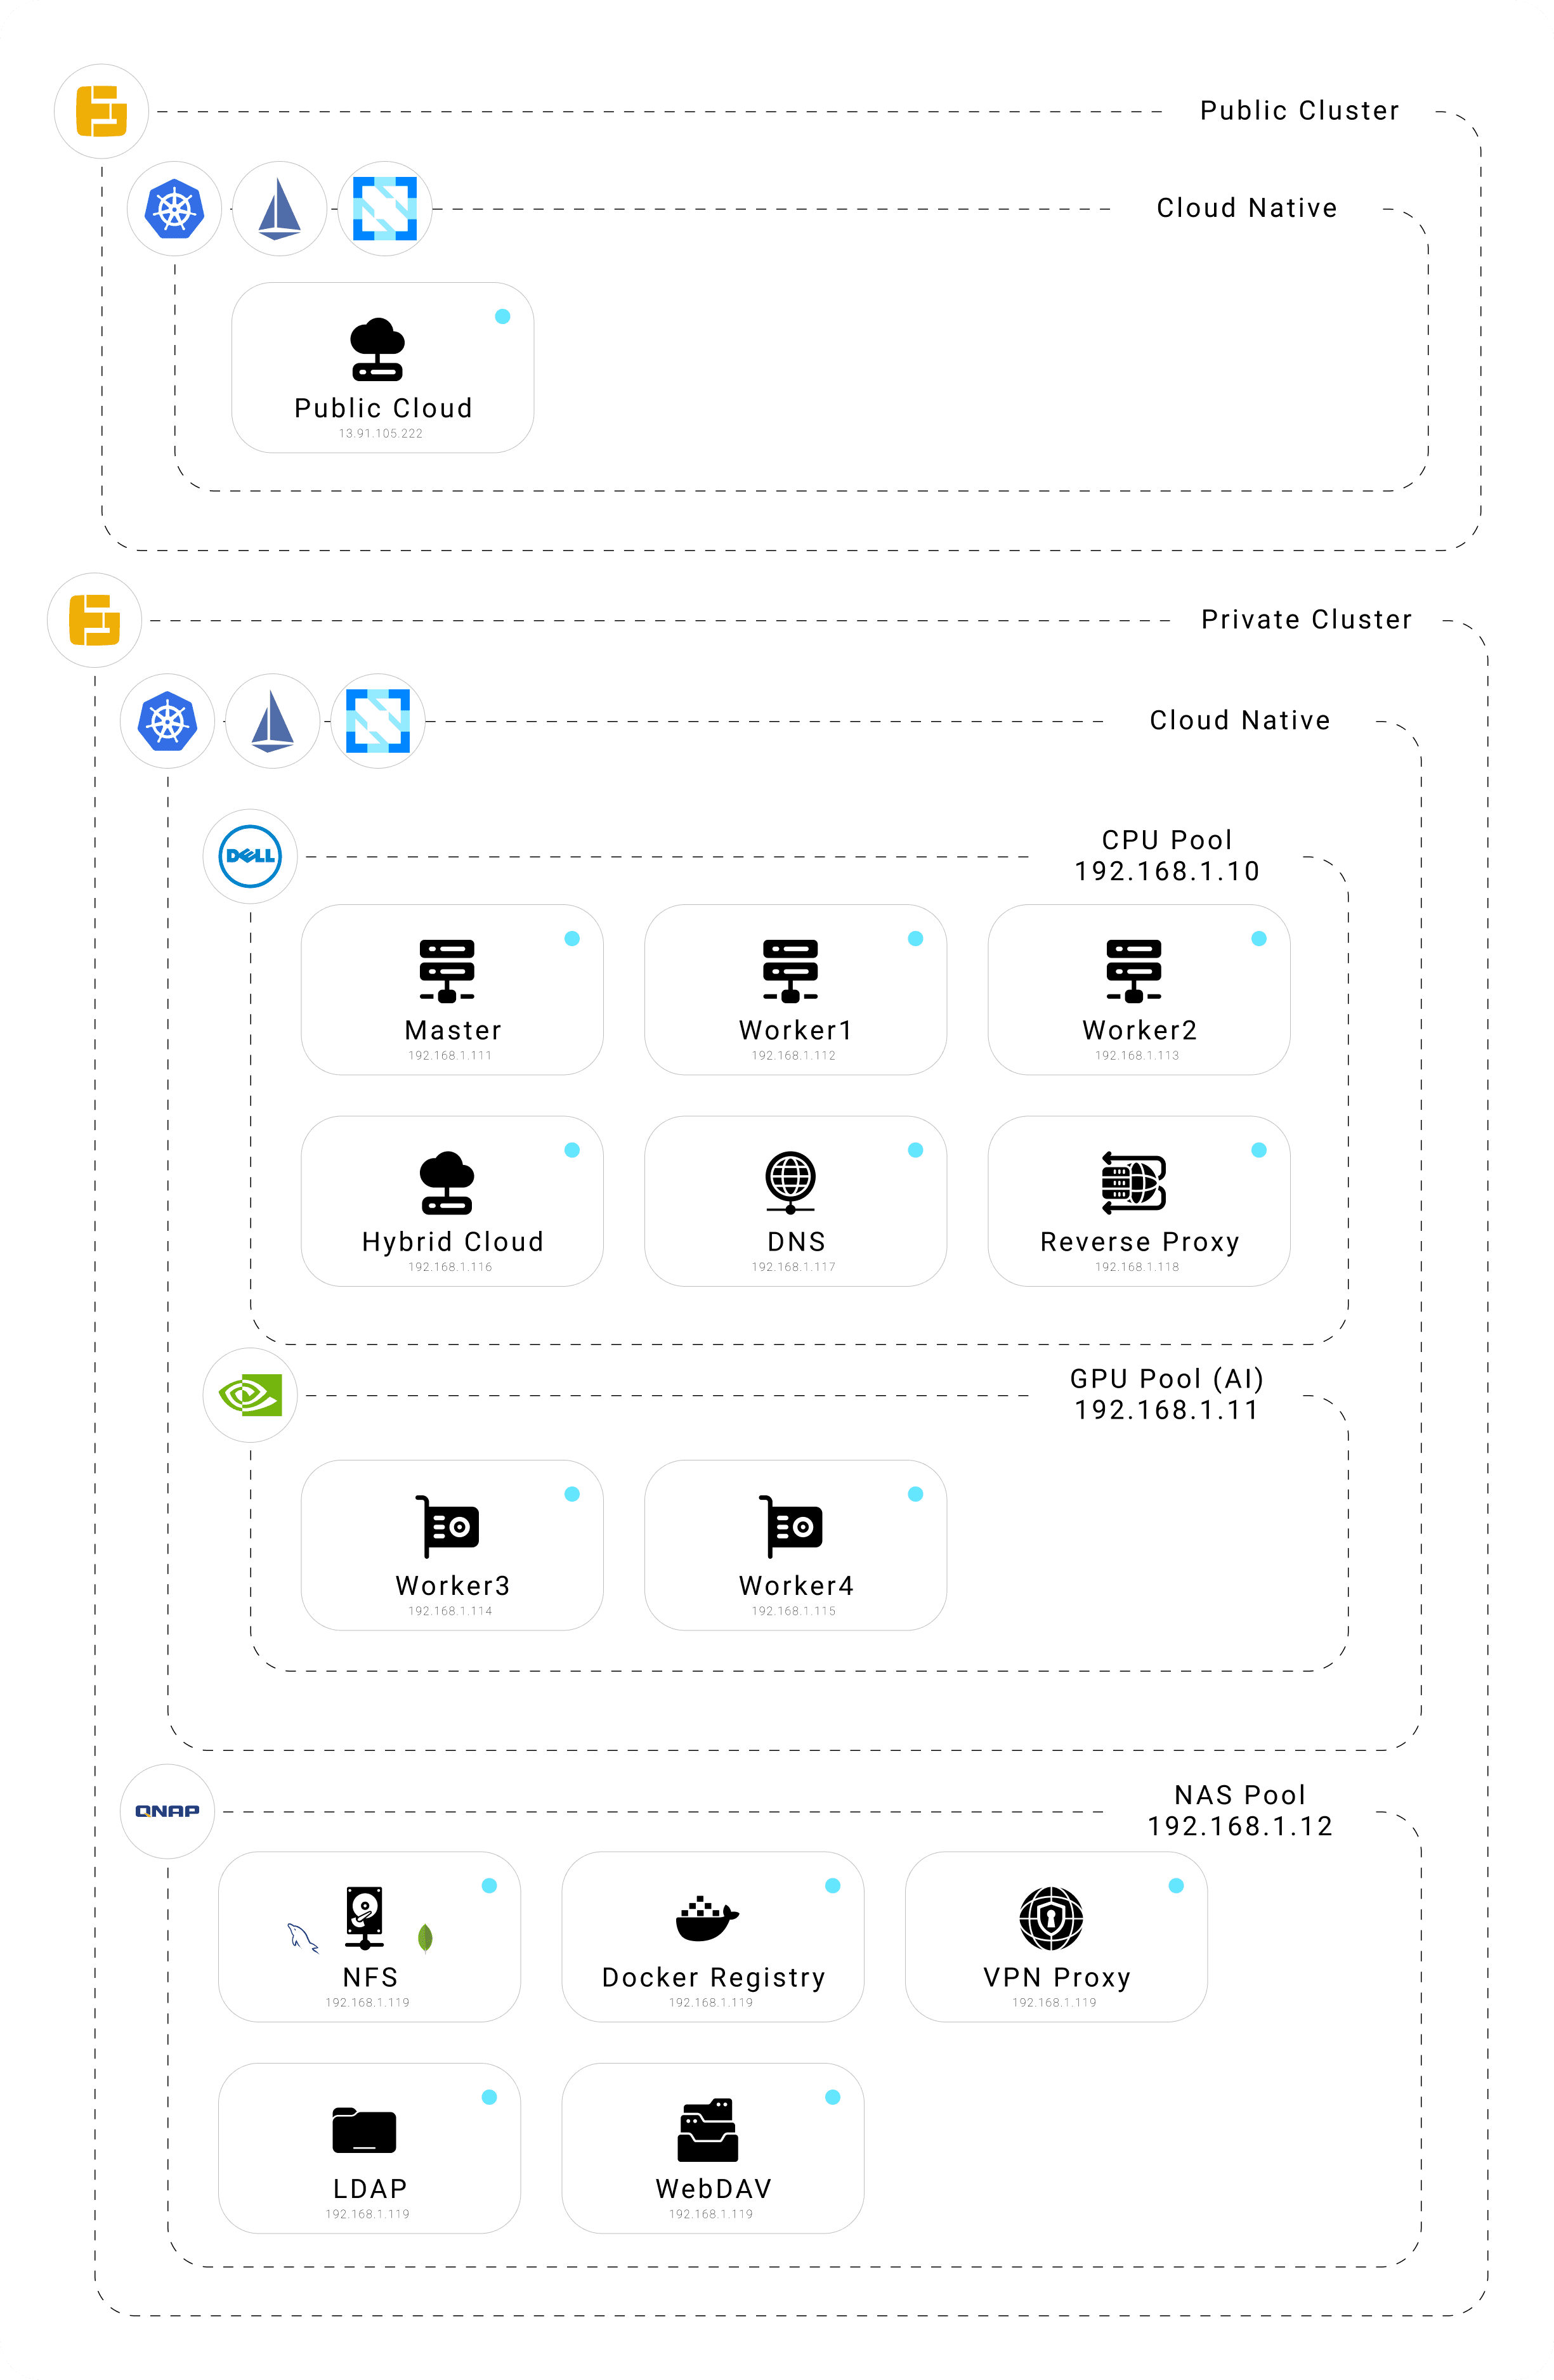
Prepare 1 cloud server and 3 internal servers for ESXi virtualization and deployment of the cloud-native suite platform as well as publishing to the internet, 1 application server (Dell EMC using iDRAC management), 1 artificial intelligence server (Nvidia GPU), 1 NAS server.
Use Kubernetes affinity to schedule Pods to adapt to CPU or GPU computation.
| Name | FQDN | IP |
|---|---|---|
| master | master.fewbox.lan | 192.168.1.111 |
| worker1 | worker1.fewbox.lan | 192.168.1.112 |
| worker2 | worker2.fewbox.lan | 192.168.1.113 |
| worker3 | worker3.fewbox.lan | 192.168.1.114 |
| worker4 | worker4.fewbox.lan | 192.168.1.115 |
| hybrid | hybrid.fewbox.lan | 192.168.1.116 |
| dns | dns.fewbox.lan | 192.168.1.117 |
| nginx reverse proxy | nginx.fewbox.lan | 192.168.1.118 |
| nas | nfs.fewbox.lan registry.fewbox.lan vpn.fewbox.lan ldap.fewbox.lan webdav.fewbox.lan | 192.168.1.119 |
| cloud | *.fewbox.com | 13.91.105.222 |


SSH
SSH No Pwd Login
1cd /Users/fewbox/.ssh
2ssh-keygen
3#/Users/fewbox/.ssh/id_ed25519: id_rsa
4cat /Users/fewbox/.ssh/id_rsa.pub
5#Copy Public Key and access the remote server
6vi ~/.ssh/authorized_keys
7chmod 600 ~/.ssh/authorized_keys
8chomd 700 ~/.ssh
9#PubkeyAuthentication yes
10vi /etc/ssh/sshd_config
11systemctl restart sshd
12#ssh -v 192.168.1.111
VSC SSH Remote
1Host Master
2  HostName 192.168.1.111
3  User root
4 IdentityFile /Users/fewbox/.ssh/id_rsaInstallation
Set IP & DNS
1cd /etc/sysconfig/network-scripts/
2vi ifcfg-enp0s3
3systemctl restart network
Disable Firewall, Enable SELinux
1systemctl stop firewalld
2systemctl disable firewalld
3sed -i  '/^SELINUX=/ c  SELINUX=disabled' /etc/selinux/config
4setenforce 0
Time Synchronization
1# TODODisable Swap Partition (swapoff -a temporarily disables)
1sed -i 's/.*swap.*/#&/' /etc/fstab
2free -m
Modify Linux Kernel Parameters
1cat <<EOF | sudo tee /etc/sysctl.d/k8s.conf
2net.bridge.bridge-nf-call-ip6tables = 1
3net.bridge.bridge-nf-call-iptables = 1
4EOF
5sysctl --system
IPVS Replaces IPTable
1yum install ipset ipvsadm
2cat <<EOF >  /etc/sysconfig/modules/ipvs.modules
3#!/bin/bash
4modprobe -- ip_vs
5modprobe -- ip_vs_rr
6modprobe -- ip_vs_wrr
7modprobe -- ip_vs_sh
8modprobe -- nf_conntrack
9EOF
10chmod +x /etc/sysconfig/modules/ipvs.modules
11/bin/bash /etc/sysconfig/modules/ipvs.modules
12lsmod | grep -e ip_vs -e nf_conntrack_ipv4
master & worker
1# Configure software repository(E.G)
2vi /etc/yum.repos.d/kubernetes.repo
3# yum --showduplicates list kubelet
4# Clean
5yum remove kubelet
6yum remove kubeadm
7# Install
8yum install kubeadm
9# View kubeadm version
10kubeadm version
11# View kubelet version
12kubelet --version
13# View Kubeadm install image
14kubeadm config images list
15# Update containerd setting
16containerd config default > /etc/containerd/config.toml
17vi /etc/containerd/config.toml
18# !!! registry.k8s.io/pause:3.6 change to registry.aliyuncs.com/google_containers/pause:3.9 and add following setting, such asdaemon.json (E.G)#
19# Change image
20sandbox_image = "registry.aliyuncs.com/google_containers/pause:3.9"
21# Support http
22[plugins."io.containerd.grpc.v1.cri".registry.mirrors."registry.fewbox.lan:5000"]
23endpoint = ["http://registry.fewbox.lan:5000"]
24# Update Endpoint setting of Containerd
25cat > /etc/crictl.yaml <<EOF
26runtime-endpoint: unix:///var/run/containerd/containerd.sock
27image-endpoint: unix:///var/run/containerd/containerd.sock
28timeout: 0
29debug: false
30pull-image-on-create: false
31EOF
32# Restart Containerd
33systemctl daemon-reload && systemctl enable containerd && systemctl restart containerd
34# View containerd Image !!!!!
35crictl images
kubernetes.repo
1[kubernetes]
2name=Kubernetes
3baseurl=https://mirrors.aliyun.com/kubernetes/yum/repos/kubernetes-el7-x86_64
4enabled=1
5gpgcheck=0
master
1# Initialize the cluster
2kubeadm init --kubernetes-version=1.28.2 \
3--apiserver-advertise-address=192.168.1.13 \
4--image-repository registry.aliyuncs.com/google_containers \
5--service-cidr=10.96.0.0/12 \
6--pod-network-cidr=10.244.0.0/16 \
7#--ignore-preflight-errors=Swap \
8#--cri-socket=unix:///var/run/cri-dockerd.sock
9# Optimize the operation method
10yum -y install bash-completion
11bash /usr/share/bash-completion/bash_completion
12bash
13. start.sh
14# Set CoreDNS network
15wget https://raw.githubusercontent.com/flannel-io/flannel/master/Documentation/kube-flannel.yml
16vi kube-flannel.yml # ☢️❗️❗️❗️☢️Change 10.244.0.0/16
17kubectl apply -f kube-flannel.yml
18# Check the certificate expiration date
19kubeadm certs check-expiration
20# kubeadm certs renew all
21# Install Metrics
22wget https://github.com/kubernetes-sigs/metrics-server/releases/latest/download/components.yaml
23docker pull registry.cn-hangzhou.aliyuncs.com/google_containers/metrics-server:v0.6.4
24vi components.yaml # (E.G)
25k apply -f components.yaml
26# Show Join Cluster Command
27# kubeadm reset (Optional)
28kubeadm token create --print-join-command
worker
1# Join the cluster
2kubeadm join 192.168.1.111:6443 --token fpzqbu.2gtsrknkcbb9izn3 --discovery-token-ca-cert-hash sha256:b1c7928254d7c838d0d633ff5d9f248331571be4780be0ff40e7035df3bb7bf4
master
1# Download
2curl -L https://istio.io/downloadIstio | sh - # or visit https://istio.io/downloadIstio, execute the shell script which is download before, or visit https://github.com/istio/istio/releases to download
3# Set the evironment variable
4cd istio-1.19.3
5export PATH=$PWD/bin:$PATH
6# List setting template
7istioctl profile list
8istioctl install # default
9# Set istio (optional)
10# k label namespace default istio-injection=enabled
Install FewBox Operator (Packing Table)
1. ./fewbox-installl.sh # Register User
2kcd fewbox-system
3k get ns fewbox-system
4k get sa fewbox
5k get clusterrolebinding fewbox # cluster-admin - fewbox/fewbox-admin
6k get cm packingtable
7k get deploy packingtable
8k get crd kits.fewbox.com
Set Domain (fewbox.com),NFS Server Address, NFS Path(/mount/nfs). Create Namespace(fewbox-system), Service Account(fewbox), Cluster Role Binding(bind cluster-admin to Namespace and Service Account), Packing Table Configuration, Packing Table Deployment, Custom Resourc Definition(Kit).
Install FewBox Component Infrastructure
1k apply -f ./component/infrastructure/boot.yaml
2k get sa nfs-client-provisioner
3k get clusterrole nfs-client-provisioner-runner
4k get clusterrolebinding run-nfs-client-provisioner
5k get deploy nfs-client-provisioner
6k get sc managed-nfs-storage
Create Tanent - Namespace(fewbox), Service Acount, Cluster Role, Cluster Role Binding, NFS Provisoner Deployment, NFS Storage Class.
Install FewBox Componennt Middleware
1k apply -f ./component/middleware/boot.yaml
2k get pvc datadir-fewbox-mysql-0
3k get pvc fewbox-redis
4k get pvc persistence-fewbox-rabbitmq-server-0
5k get pv # From PVC
6#k get cm npmregistry
7k get cm fewbox-rabbitmq-plugins-conf  #??
8k get cm fewbox-rabbitmq-server-conf
9k get deploy fewbox-redis
10k get svc fewbox-mysql-instances
11k get svc fewbox-rabbitmq
12k get svc fewbox-rabbitmq-nodes
13k get svc fewbox-redis
14k get crd rabbitmqclusters.rabbitmq.com
15k get clusterrole rabbitmq-cluster-operator-role
16k get sa fewbox-mysql-sidecar-sa
17k get sa fewbox-rabbitmq-server
18k get rolebinding fewbox-mysql-sidecar-rb
19k get rolebinding fewbox-rabbitmq-server
20k get rmq fewbox-rabbitmq
21#Username
22k get secret fewbox-rabbitmq-default-user -o jsonpath="{.data.username}" | base64 --decode
23k get secret fewbox-rabbitmq-default-user -o jsonpath="{.data.password}" | base64 --decode
24#RabbitMQ
25k exec -it fewbox-rabbitmq-server-0 bash
26k port-forward service/fewbox-rabbitmq amqp --address 0.0.0.0
27k port-forward service/fewbox-rabbitmq management --address 0.0.0.0
28#rabbitmq-plugins enable rabbitmq_management
29#MySQL
30k exec -it fewbox-mysql-0 bash
31# SQL >
32# mysqlsh fewbox@localhost --sql
33# set global read_only=0;
34k port-forward service/fewbox-mysql-instances mysql --address 0.0.0.0
35#MongoDB
RabbitMQ create CRD,Cluster Role, Service Account, RoleBinding, Cluster Role Binding, Deployment, Virtual Service. Create MySQL Secret, InoDB Cluster, Destination Rule, Virtual Service。创建Redis PVC, Deployment, Service, Destination Rule, Virtual Service. Create MongoDB.
idiom
start.sh
1export KUBECONFIG=/etc/kubernetes/admin.conf
2alias k=kubectl  #~/.bashrc
3source <(kubectl completion bash)
4source <(kubectl completion bash | sed s/kubectl/k/g)
5alias kcd='kubectl config set-context $(kubectl config current-context) --namespace'
6# export CALICO_DATASTORE_TYPE=kubernetes
7# export CALICO_KUBECONFIG=/etc/kubernetes/admin.conf
8# export PATH=$PATH:/root/istio-1.6.2/bin/
components.yaml
1image: registry.aliyuncs.com/google_containers/metrics-server:v0.6.4
2args:- --cert-dir=/tmp
3- --secure-port=4443
4- --kubelet-preferred-address-types=InternalIP,ExternalIP,Hostname
5- --kubelet-use-node-status-port
6- --kubelet-insecure-tls # Add this line (New Version)
kubectl
1# Check for insufficient resources.
2kubectl describe node
3# Check the resource usage ratio.
4kubectl describe node |grep -E '((Name|Roles):\s{6,})|(\s+(memory|cpu)\s+[0-9]+\w{0,2}.+%\))
Docker Registry
1# Download image
2docker pull anoxis/registry-cli
3# Execute image command
4#---List all image and tag---#
5docker run --rm anoxis/registry-cli -r http://192.168.1.38:5000
6#---List all image, tag and layer---#
7docker run --rm anoxis/registry-cli -r http://192.168.1.38:5000 --layers
8#---List part image or tag---#
9docker run --rm anoxis/registry-cli -r http://192.168.1.38:5000 -i  fewbox/auth fewbox/empty
10docker run --rm anoxis/registry-cli -r http://192.168.1.38:5000 -i  fewbox/auth fewbox/empty --layers
11#---Keep only the most recent 10 versions.---#
12docker run --rm anoxis/registry-cli -r http://192.168.1.38:5000 --delete
13#---Keep only the most recent 5 versions.---#
14docker run --rm anoxis/registry-cli -r http://192.168.1.38:5000 --delete --num 5
15#---Wildcard---#
16docker run --rm anoxis/registry-cli -r http://192.168.1.38:5000 --delete --tags-like "snapshot-" "^stable-[0-9]{4}.*"
17docker run --rm anoxis/registry-cli -r http://192.168.1.38:5000  -i fewbox/template-app --delete-all
18#---Dryrun---#
19docker run --rm anoxis/registry-cli -r http://192.168.1.38:5000  -i fewbox/template-app --delete-all --dry-run
20#---Delete all tags of the image at a specific time.---#
21docker run --rm anoxis/registry-cli -r http://192.168.1.38:5000  --dry-run --delete-by-hours 24 --keep-tags c59c02c25f023263fd4b5d43fc1ff653f08b3d4x --keep-tags-like latest
22docker run --rm anoxis/registry-cli -r http://192.168.1.38:5000  docker run --rm anoxis/registry-cli -r http://192.168.1.38:5000  --delete --tags-like "snapshot-" "^stable-[0-9]{4}.*" --keep-tags "stable" "latest"
23#---Delete all tags of a specific image.---#
24--dry-run --delete --keep-by-hours 72 --keep-tags-like latest
25#---!!!!!!!!!!!Clean GC!!!!!!!!!!!---#
26# Delete Repository!!!
27
28docker ps
29docker exec {container id} registry garbage-collect --delete-untagged /etc/docker/registry/config.yml
30docker stop {containerid}
31docker start {container id}